How To Convert Multiple Images:
- Choose the menu item .
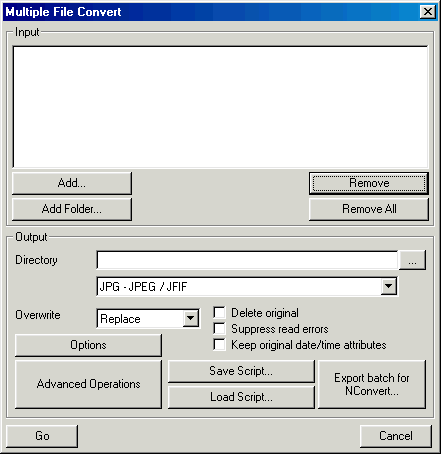
The following Multiple File Convert dialog is displayed:

- A list of the images to convert is displayed in the Input panel. Initially the list is empty.
- Use the Add, Add Folder, Remove, and Remove All buttons to create a list of image files to convert.
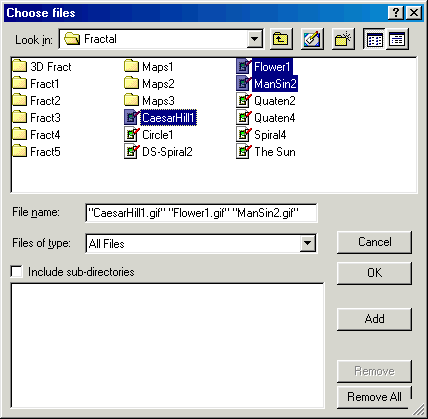
- When the Add Button is pressed the Choose Files dialog is displayed:

-
In the above dialog, you can choose one or more files which will be included in the list of image files to be converted.
Use the Ctrl key and mouse click to select multiple files. - Finally confirm your selection with the OK button. This can be repeated until you finally have the list you want.
- While converting, not only the format of the images can be changed, but image effects, filters, and transformations can be applied. If you only want to change the image format, do not do any of the following steps and use no advanced commands:
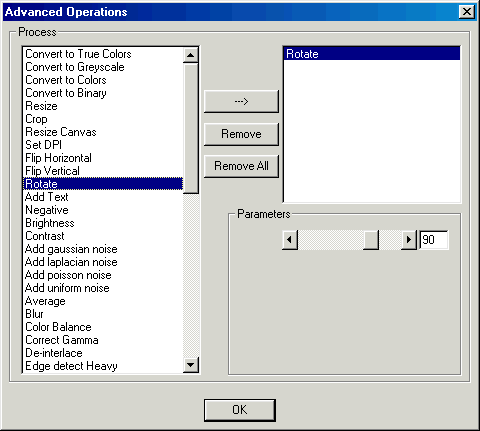
- Choose the Advanced Operations button. The following dialog is displayed:
The Advanced Operations dialog displays all the image effects, filters, and transformations available in XnView on the left hand side.
- Select the required image operation(s) to be applied to each of the images on conversion. If an operation has parameters to be set, then the Parameters frame with controls is displayed below the selected operations on the right hand side of the dialog.
The image operations will be applied in the order of the list, from top to bottom.
- Confirm your selections using the OK button.
- Choose the Advanced Operations button. The following dialog is displayed:
- Select the image format that the images should be saved in. If the original image format is not the same as the final one, then a conversion is performed.
- Input the target directory for the converted images. This can be directly or by using the ... button. If the converted images are to be created in the same directory as the original images then leave the directory field blank.
- If you want to delete the original image file(s) after conversion, use the check box Delete original.
- If XnView cannot open or read an image file, you can decide whether to ignore such read errors (Suppress read errors ) and continue to convert the other files.
- Start the conversion process by selecting the Go button.
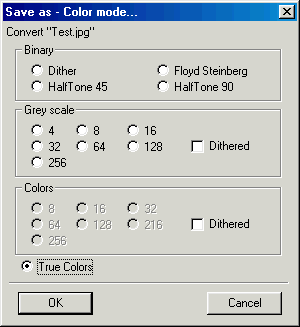
Depending on the output format, a last dialog may be displayed where you can define the colour mode of the converted images more exactly:

- Select the desired option and check boxes.
- Start the conversion by selecting the OK button.
- Once the conversion is finished, you exit the Multiple file convert dialog by selecting the Cancel button.
 Tips:
Tips:
Select all image files which you want to convert in the Browser.Select the Menu option or the Symbol
 in the toolbar.
The Multiple File Convert dialog is displayed with the selected images already in the list of files.
 Hints:
- Web designers please check the Hints About HTML Image Maps chapter.
 Convert...